

Some time ago, I commented upon how I admire the Chapelon Nord Pacific locomotive for its livery and overall good looks, while being mindful that beauty is in the eye of the beholder. To some, this Chocolat compound locomotive may seem quite ugly - but not to me. ;-)
In addition to visual appeal, there are the innovative aspects of the prototype design, the compounding, the alternate steam path 'simple' starting circuit, Lenz-Dabeg poppet valves, Kylchap exhaust among other things. Chapelon's designs occasionally achieved a 12 % efficiency!
I recognize that there are steam locomotive enthusiasts who may swoon over an air-smoothed boiler casing and the stream-lined appearance; I generally favor the opportunity to admire piping, conduits, valves, pumps, oilers, injectors and anything that is cast, forged or machined and bolted on.
I asked a few people to be on the look-out for me and not long after putting the word out, Andrew Pullen found a very lightly steamed . . . or perhaps even unsteamed model for me, factory built and in overall near-mint condition.
I hadn't been around the hobby for very long when I first saw this model as a highly detailed model . . . and so what to me seemed like a finely detailed model, is by today's standards only moderately detailed.
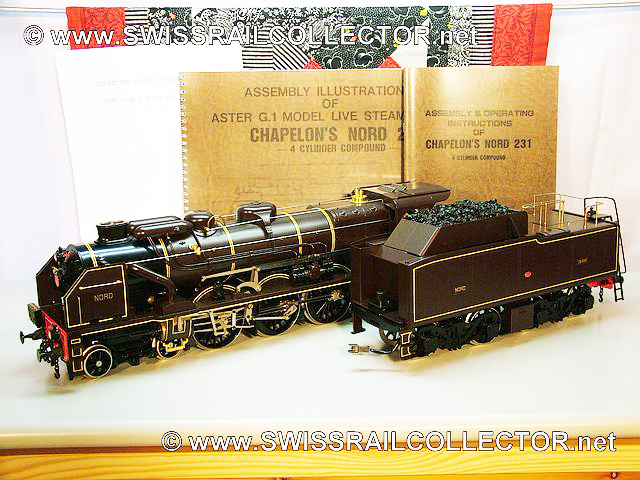
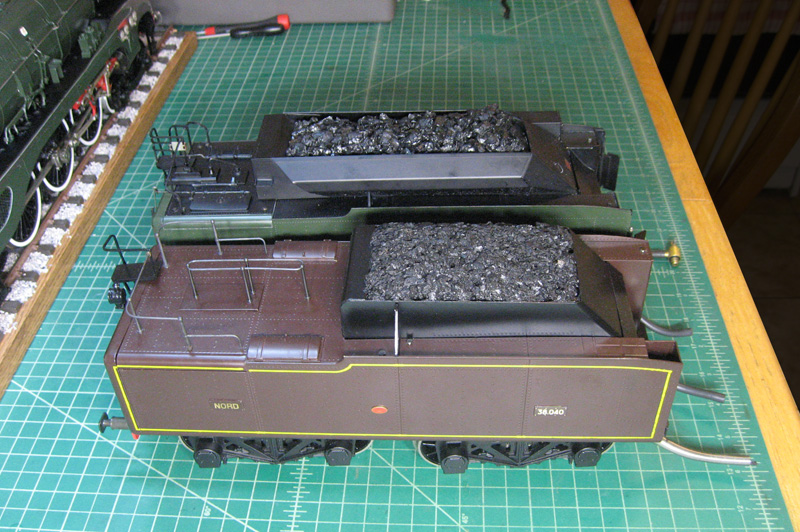
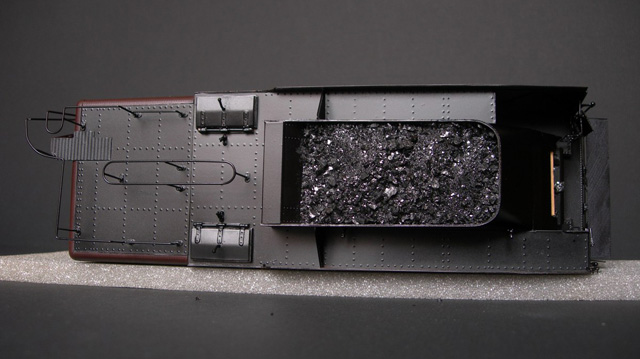
Let's start by looking at the tender. . .
![Image]()
I have taken quite a lot of photographs of the projects I work on, but for some reason, I neglected to take a "before" picture of my tender and so I borrowed the above photo from The Swiss Rail Collector.
The area of focus for me are these things:
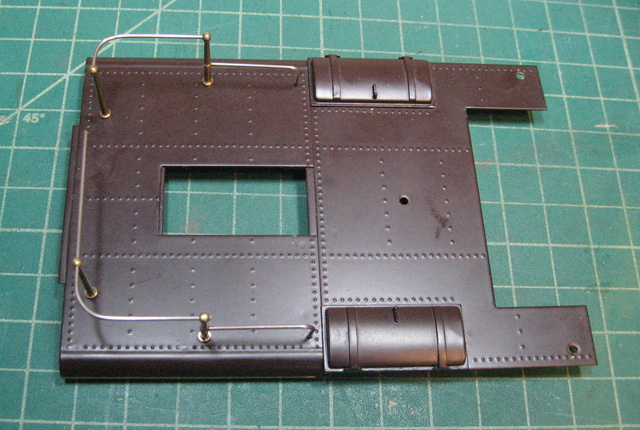
The front of the tender has no detailing and research shows that it would not have been brown even when the sides and rear were brown.
The coal hopper cowling likewise would not have been brown.
![Image]()
Does anyone suppose that the stanchions on the tender deck were made of machined brass and that the handrails were made of polished stainless steel?
Context always matters.
This model was designed and built in 1988 and the approach back them must not have had rivet counters in mind the way we have since seen, not only from Aster, but from Accucraft, Bowande and others in the 21st century. So, I am in no way meaning to disparage a model that was produced in 1988 . . . and a beautiful model in its own right at that. If the Chapelon Pacific were produced today by Aster, it would be detailed more like a 241P and the price would be "up there" as well.
Like many of you, I have fun tinkering and adding detail.
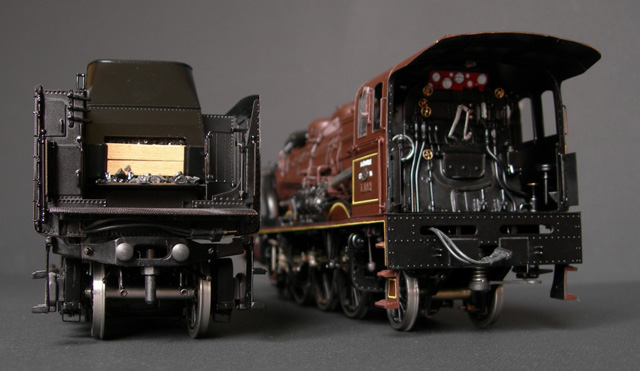
Here we go!
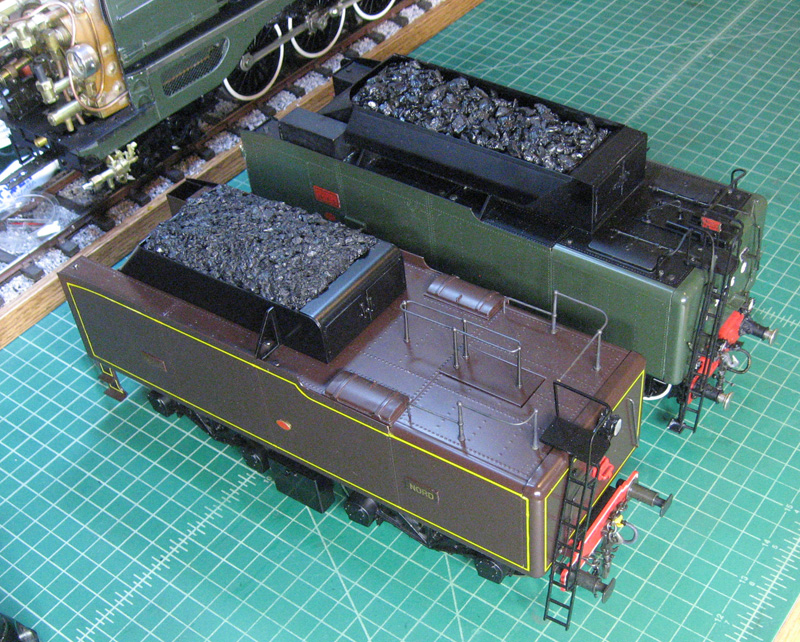
![Image]()
What you see above is, among other things, an indication of a level of detail increase from 1988 to 1991. I am assuming the sponsor of the 1991 model may have said :"spare no expense to increase the authenticity," or some such.
After taking the model apart, I decided not to paint the stanchions or the railings as I wanted a better look than I believed paint would provide.
What I ended up doing is blackening the brass stanchions with Birchwood Casey Brass Black. That took care of half the problem, but how does one blacken stainless steel?
After some research which uncovered costly, messy and dangerous methods, methods that may be akin to a chemotherapy treatment, I found a couple of posts by a fellow in Croatia who recommended a simple approach that works very well when you can remove or otherwise isolate the piece.
Coat the stainless steel in an organic oil. I used Tuscan olive oil! I believe the brand was Lucini.")
Then heat the metal until it glows bright orange and let it cool naturally. I repeated the process several times until I got just the patina I wanted. Done.
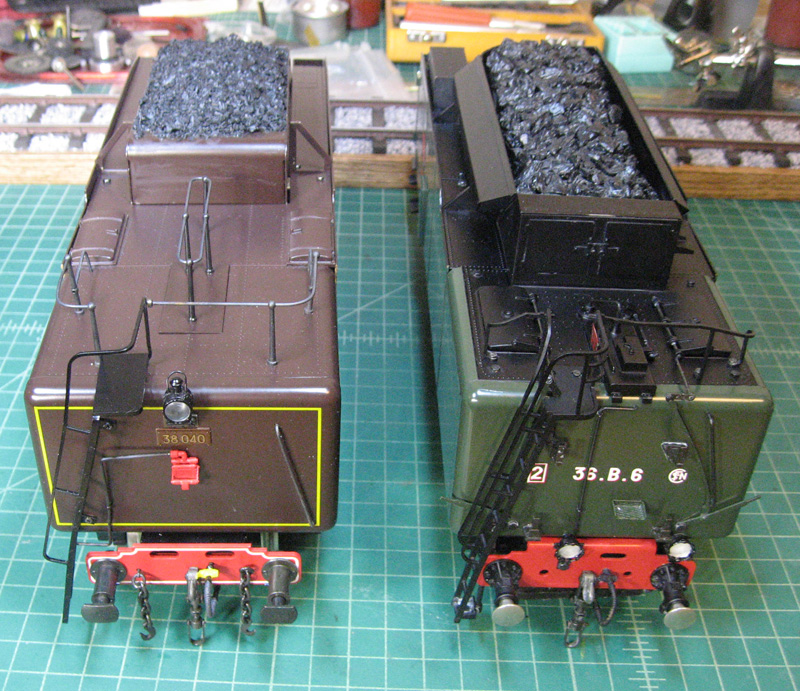
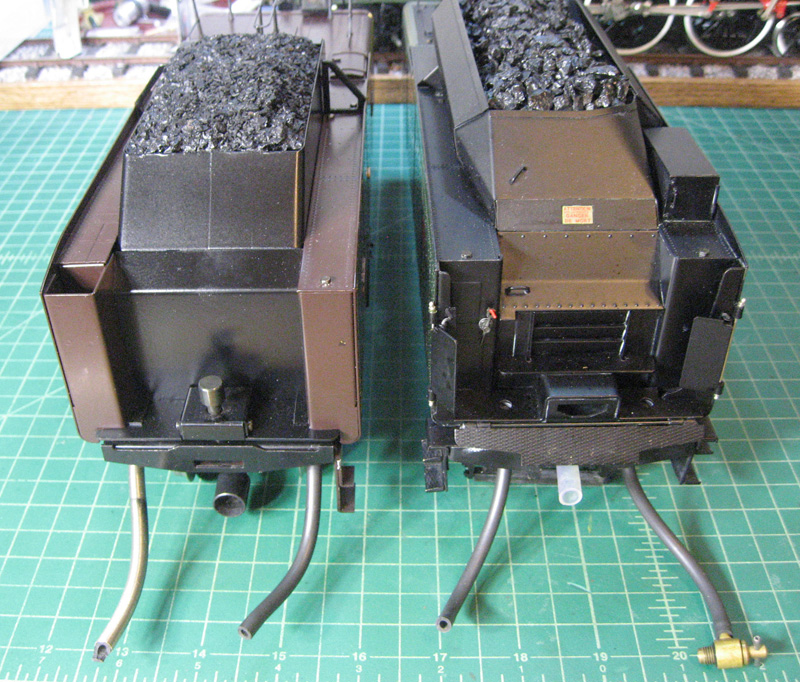
The coal cowling looks like it may belong on a tin-type model, so that came next:
![Image]()
![Image]()
![Image]()
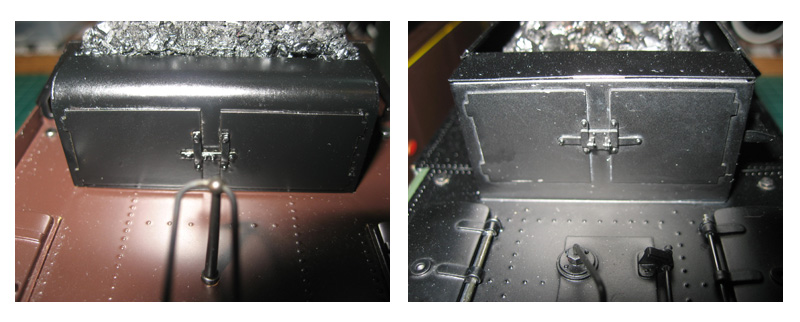
What about the front of the tender?
![Image]()
At the beginning of the process, the front was all brown. What you see above is a work in progress. I am currently thinking that the front should be entirely black.
I am also thinking that all or or half of the tender deck may be black as well?
Simon and perhaps others may be able to add some input.
Here are some photos which have influenced what I am doing:
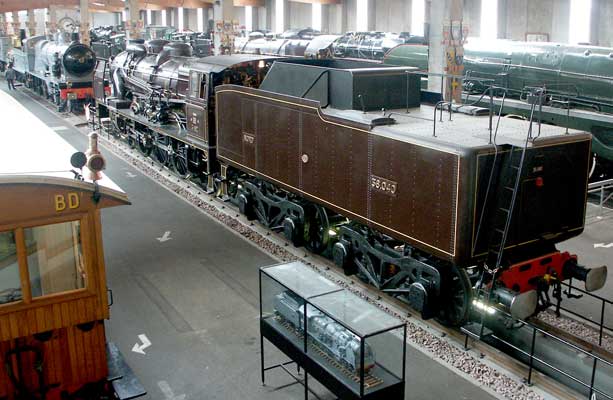
This one from the museum in Mulhouse . . .
![Image]()
It is obvious that the coal cowling is black and there are rear doors and support rods with ball-ends on the outer hatch covers, but not much else is obvious.
And these two from a site called La Caverne du Rail of a model by Magrou (2012.)
![Image]()
![Image]()
![Image]()
I won't admit to how much time I spent researching this stuff.
More to follow, of course . . .
Cheers,
Joe
In addition to visual appeal, there are the innovative aspects of the prototype design, the compounding, the alternate steam path 'simple' starting circuit, Lenz-Dabeg poppet valves, Kylchap exhaust among other things. Chapelon's designs occasionally achieved a 12 % efficiency!
I recognize that there are steam locomotive enthusiasts who may swoon over an air-smoothed boiler casing and the stream-lined appearance; I generally favor the opportunity to admire piping, conduits, valves, pumps, oilers, injectors and anything that is cast, forged or machined and bolted on.
I asked a few people to be on the look-out for me and not long after putting the word out, Andrew Pullen found a very lightly steamed . . . or perhaps even unsteamed model for me, factory built and in overall near-mint condition.
I hadn't been around the hobby for very long when I first saw this model as a highly detailed model . . . and so what to me seemed like a finely detailed model, is by today's standards only moderately detailed.
Let's start by looking at the tender. . .
I have taken quite a lot of photographs of the projects I work on, but for some reason, I neglected to take a "before" picture of my tender and so I borrowed the above photo from The Swiss Rail Collector.
The area of focus for me are these things:
The front of the tender has no detailing and research shows that it would not have been brown even when the sides and rear were brown.
The coal hopper cowling likewise would not have been brown.
Does anyone suppose that the stanchions on the tender deck were made of machined brass and that the handrails were made of polished stainless steel?
Context always matters.
This model was designed and built in 1988 and the approach back them must not have had rivet counters in mind the way we have since seen, not only from Aster, but from Accucraft, Bowande and others in the 21st century. So, I am in no way meaning to disparage a model that was produced in 1988 . . . and a beautiful model in its own right at that. If the Chapelon Pacific were produced today by Aster, it would be detailed more like a 241P and the price would be "up there" as well.
Like many of you, I have fun tinkering and adding detail.
Here we go!
What you see above is, among other things, an indication of a level of detail increase from 1988 to 1991. I am assuming the sponsor of the 1991 model may have said :"spare no expense to increase the authenticity," or some such.
After taking the model apart, I decided not to paint the stanchions or the railings as I wanted a better look than I believed paint would provide.
What I ended up doing is blackening the brass stanchions with Birchwood Casey Brass Black. That took care of half the problem, but how does one blacken stainless steel?
After some research which uncovered costly, messy and dangerous methods, methods that may be akin to a chemotherapy treatment, I found a couple of posts by a fellow in Croatia who recommended a simple approach that works very well when you can remove or otherwise isolate the piece.
Coat the stainless steel in an organic oil. I used Tuscan olive oil! I believe the brand was Lucini.
Then heat the metal until it glows bright orange and let it cool naturally. I repeated the process several times until I got just the patina I wanted. Done.
The coal cowling looks like it may belong on a tin-type model, so that came next:
What about the front of the tender?
At the beginning of the process, the front was all brown. What you see above is a work in progress. I am currently thinking that the front should be entirely black.
I am also thinking that all or or half of the tender deck may be black as well?
Simon and perhaps others may be able to add some input.
Here are some photos which have influenced what I am doing:
This one from the museum in Mulhouse . . .
It is obvious that the coal cowling is black and there are rear doors and support rods with ball-ends on the outer hatch covers, but not much else is obvious.
And these two from a site called La Caverne du Rail of a model by Magrou (2012.)

I won't admit to how much time I spent researching this stuff.
More to follow, of course . . .
Cheers,
Joe


